Custom Build - Step by Step
Building a custom instrument extends the wants, needs and dreams of the player. The process combines a normal build cycle with the very important task of extracting requirements for performance and filling a wish list that may stretch back to the players very first guitar. I call it the "Choose your destroyer" moment after the scene in Ghostbusters when the Stay-puff marshmallow man tries to destroy New York. It can be a sticky scene. It is fun to dream but a lot of decisions on looks and performance must be made. There is some leeway but, for a great design the most intimate and seemingly inconsequential details will be hashed out before the luthier's shop hums to life.
Photos from my last two custom builds are included here. James Gosset(JG), who owns the Ziricote J1 was able to visit the shop on critical workdays and has provided some of the photos via his iPad. Before that, we spent hours choosing tone woods and going over performance requirements. Additionally, I included him in the design process for the inlays. Together, we created something rare and beautiful.
Let's get started!
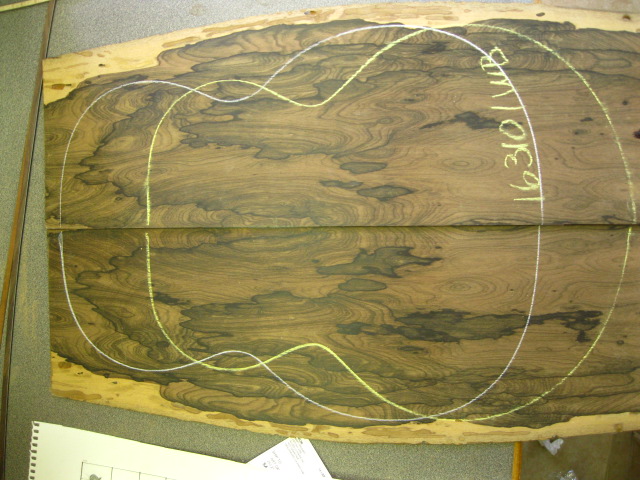
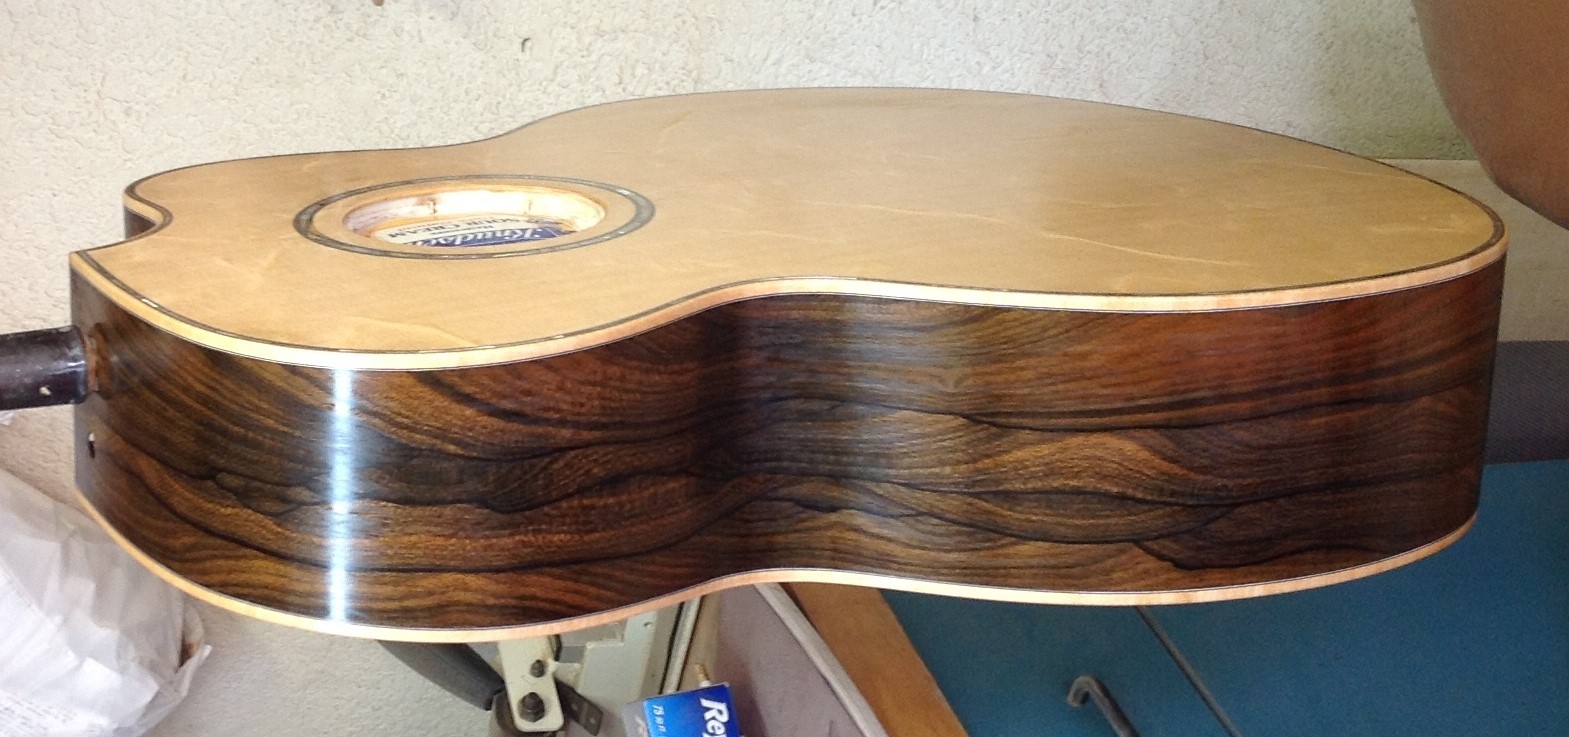
We scoured the internet to find this rare set of Ziricote back and sides. There was a crack in the back but the seller never mentioned it until I called him. I moved the outline and luckily the client liked the change. With the exception of figured maple or koa, hardwoods for guitars have traditionally been chosen for a lack of flaws that are now considered beautiful. This is a blessing and a curse for luthiers. A wider range of species are available but they are usually more difficult or dangerous to work with. This time we lucked out.
When the tone woods come from a supplier they are usually sanded to thickness (about .200") and ready for jointing. The wood in this photo came from a Monterrey Cypress tree that was growing in the parkway next to Point Loma Boulevard about a block from my house. These pieces had to be hauled down the block in a front loader then split, sawn, sanded and cured before this step. The cost is about the same except for the sore back and smashed knuckles. Then, there is the added pride in accomplishment such as baking bread from scratch.
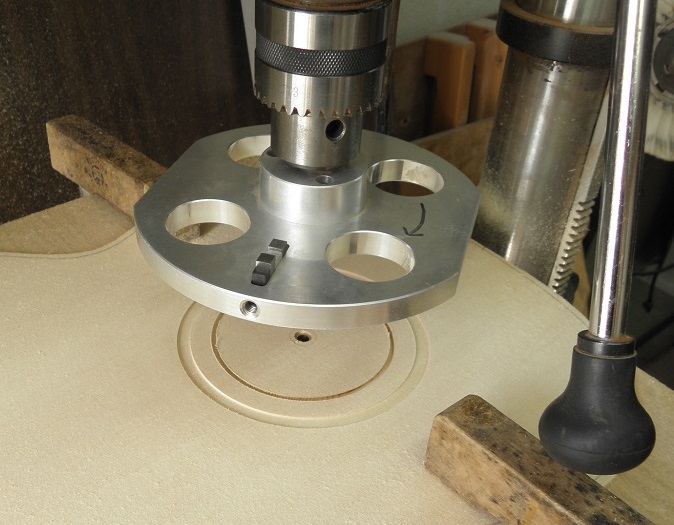
The top is sanded to .140" and the rosette is cut. Then a combination of abalone or herringbone and thin purfling strips are pressed into the slot. The pieces are glued in with CA (super)glue. I use a thin coat of shellac to coat the slot. This keeps the CA glue from soaking too far into the exposed end grain and creating stains when it reacts with the waterborne finish.
The top is ready to be braced when it is between .115" and .090". Classical guitars are the thinnest and bluegrass guitars or basses may approach .120" in the area between the sound hole and bridge. Strength, tonality and wear are key factors to deciding tone plate thickness. The distances from the bridge to the neck joint and the top brace layouts are the same for every guitar. The layout jig in the photo could be used for another model in a pinch but it is also used for finding the best outline. There is one jig for each model and type.
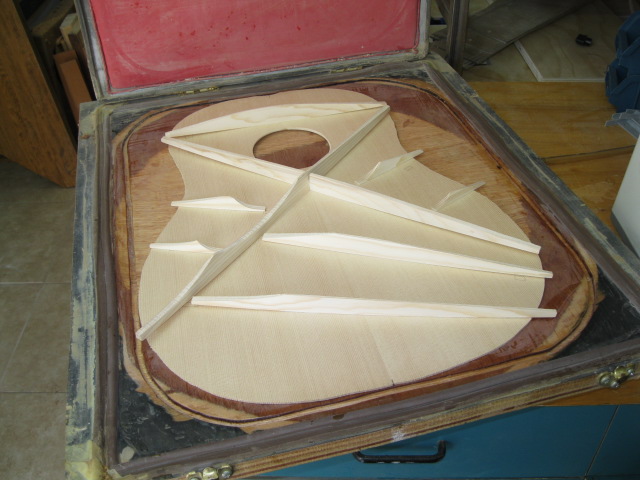
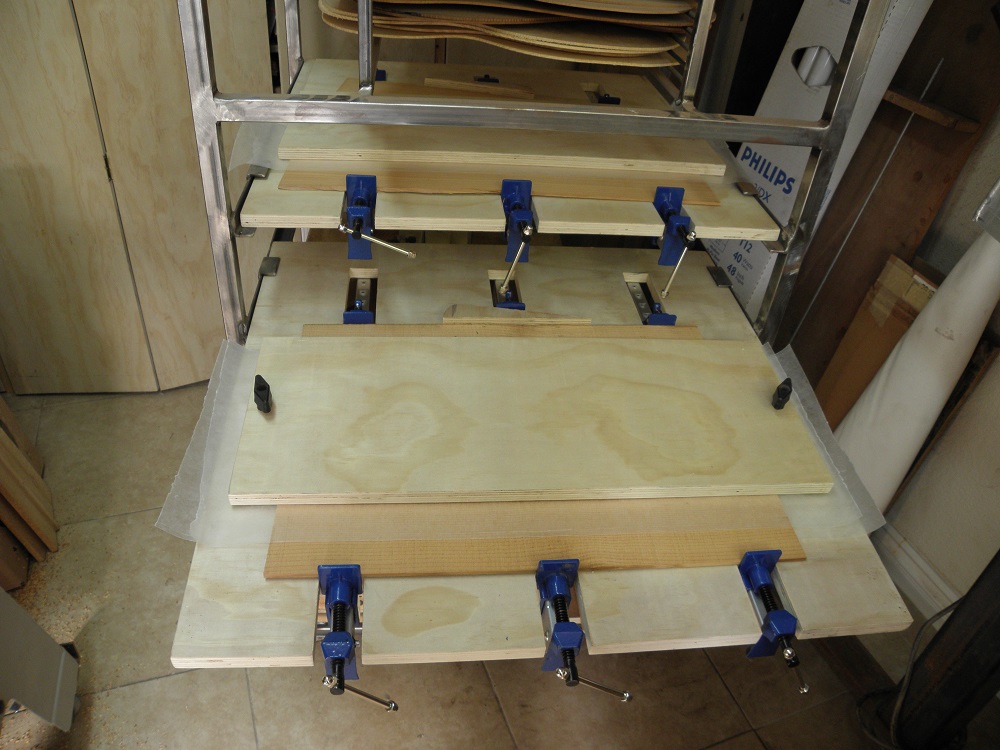
The top and back braces are glued up in a vacuum jig. The jig bed was carved, sanded and finished by hand. Both the top and back are pressed into a 20 foot spherical radius. The braces are carved as a billet to a matching radius and sawn to proper thickness. Glue is applied, braces are set in place, the frame and membrane is laid on top and the vacuum pump sucks everything into place. Bracing on custom guitars can be tightly focused when the player's needs and preferences are known. Stiffness, density, width, height and grain are matched to a set of variables such as string gauges, tunings and playing styles.
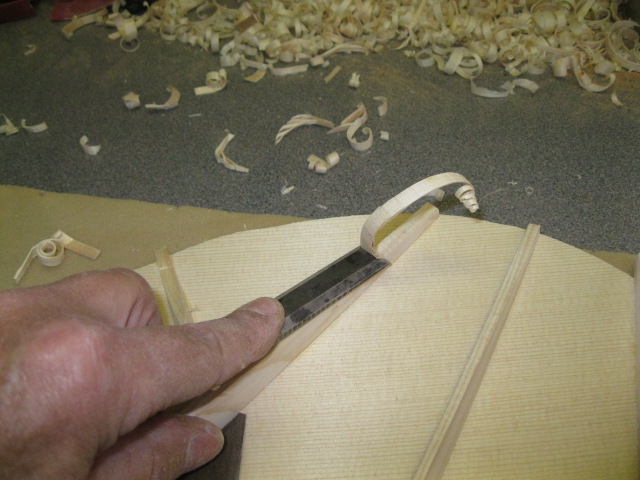
All the braces are carved by hand. There is a general criterion which reflects a guitar's basic needs to resist and respond to string tension, vibration and environmental stress. Additionally the top and back are tuned to mitigate the Heimholtz resonance defined by the body volume and sound hole dimensions. For a bowed instrument or when a guitar is plugged in the body resonance creates a wolf tone. On an acoustic guitar the body resonance incites the guitar to act like a bellows which causes resistance that kills the note. Every guitar has this problem but in a well built guitar it will be almost unnoticeable.
The sides are sanded to final thickness along with the top and back. I bend sides on the thick side; about .090". The sidebenders are designed to emulate a handcrafted process which allows the luthier to sense problems and quirks in the wood. The end result eliminates the need for a cooling jig. The sides come off the bender ready for trimming, a quick brush on a flap sander and into the blocking jig.
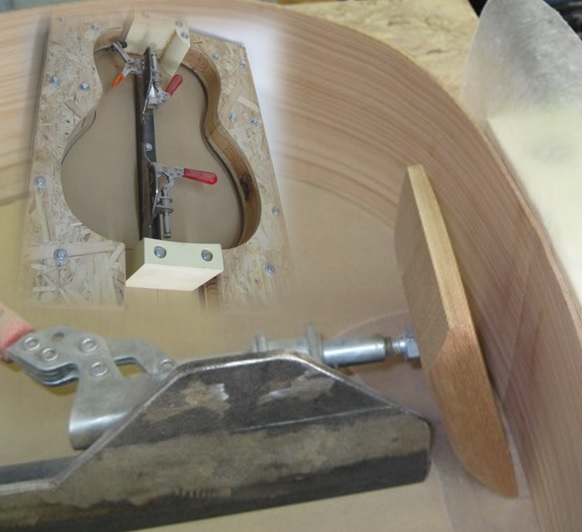
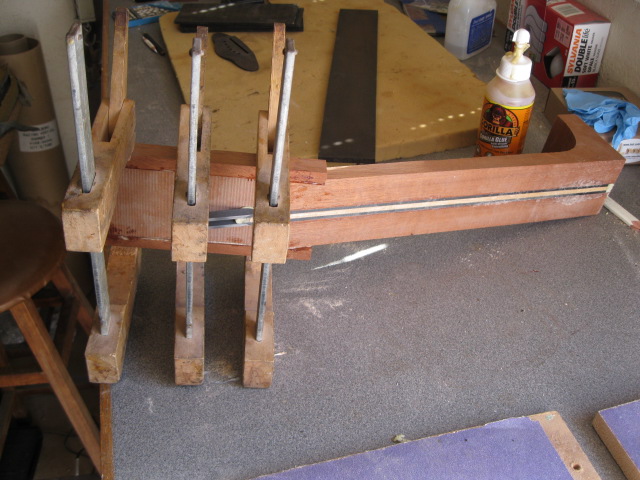
The trimmed sides are placed into the blocking jig. The outside mold and a slot cut into the jig base matches the 20 foot bowl radius which keeps the sides aligned. The De-sta-co clamps press the blocks against urethane cauls molded in the A.Davis shop. These joints are key factors in a guitars resilience and acoustic response. I use urethane glue here. No amount of heating, soaking, praying or time will loosen the joint. Luthiers tend to promote guitars that can be taken apart and repaired. I agree, but in my experience at Taylor, I have seen only 1 in 20 thousand guitars get their blocks replaced. The neck joint and cutaway design on an A.Davis guitar creates effective force resistance while remaining light and resonant; giving the upper bout the best chance to culture the sound.
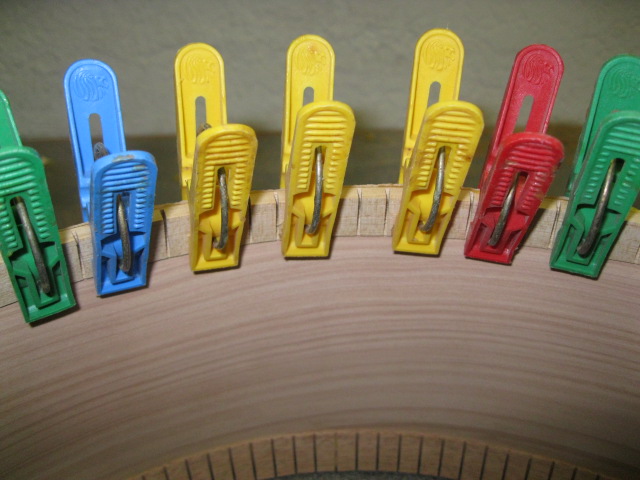
Kerfed mahogany lining is added to the sides for joining to the top and back. The kerfing adds gluing surface and strength to the guitar's edges while remaining flexible to transfer resonance through the joint. I found these clothes pins in the 99 cent store next to my first shop in Hillcrest. Their design allows for pin-point accuracy in how the pressure is applied. I have seen no other kerfing clamp that can do this. It is important because kerfing needs to be relieved with a fret saw and manipulated with the clamps to match the side's complex edge curve.

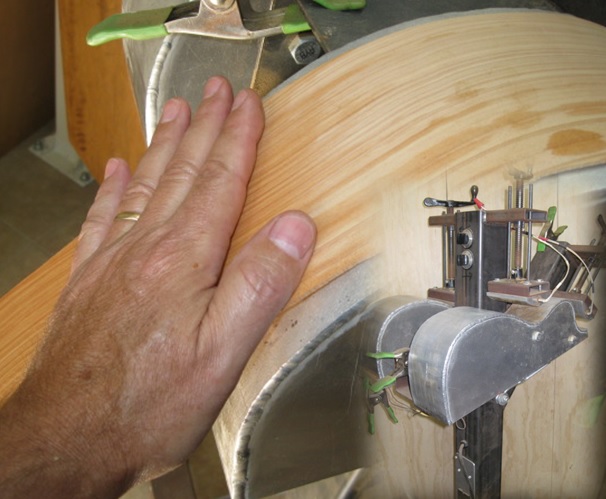
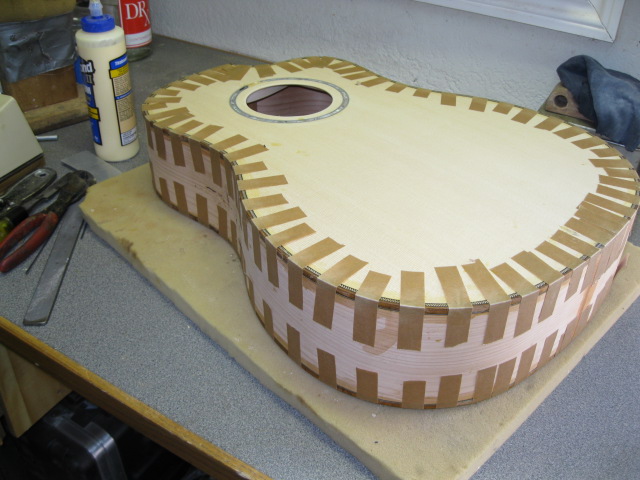
The sides are clamped into a mold and the mating edges are contoured on a large disc sander. Slots are cut with a laminate trimmer where the braces meet the sides. Then, any final sanding tuning or detailing is completed and the body elements are glued up in a press. The top and bottom plates for the press have the same 20 foot radius as the braces, blocking jigs and side contours. A handful of 1/4" all-thread clamps the pieces together. In a couple of hours we have a guitar body.
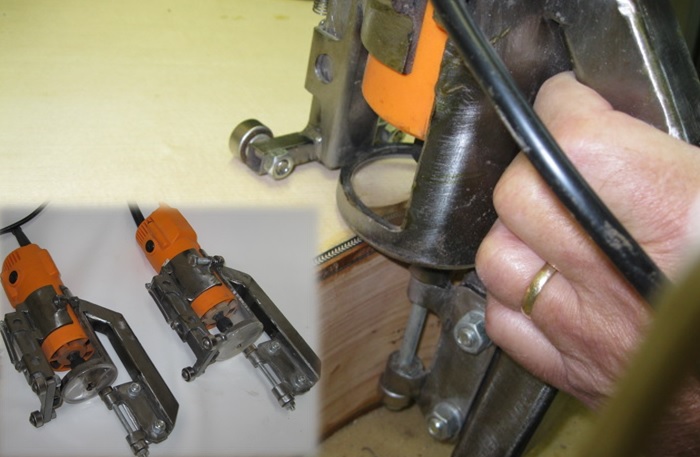
The edges of the top and back are trimmed then rabbets are cut for the binding with purpose made laminate trimmer tools. The tools have roller bearings that keep them aligned with the sides. The binding and purfling fit nicely into the rabbet. Traditionally this is a tricky job requiring excellent skills and perfectly sharp tools. By automating some of the process, the end result is more accurate and the cost savings can be applied in other areas. Additionally the luthier's stress level goes way down. I designed these trimmers for industrial use. Accuracy is certain and I have not had to adjust them in 5 years.
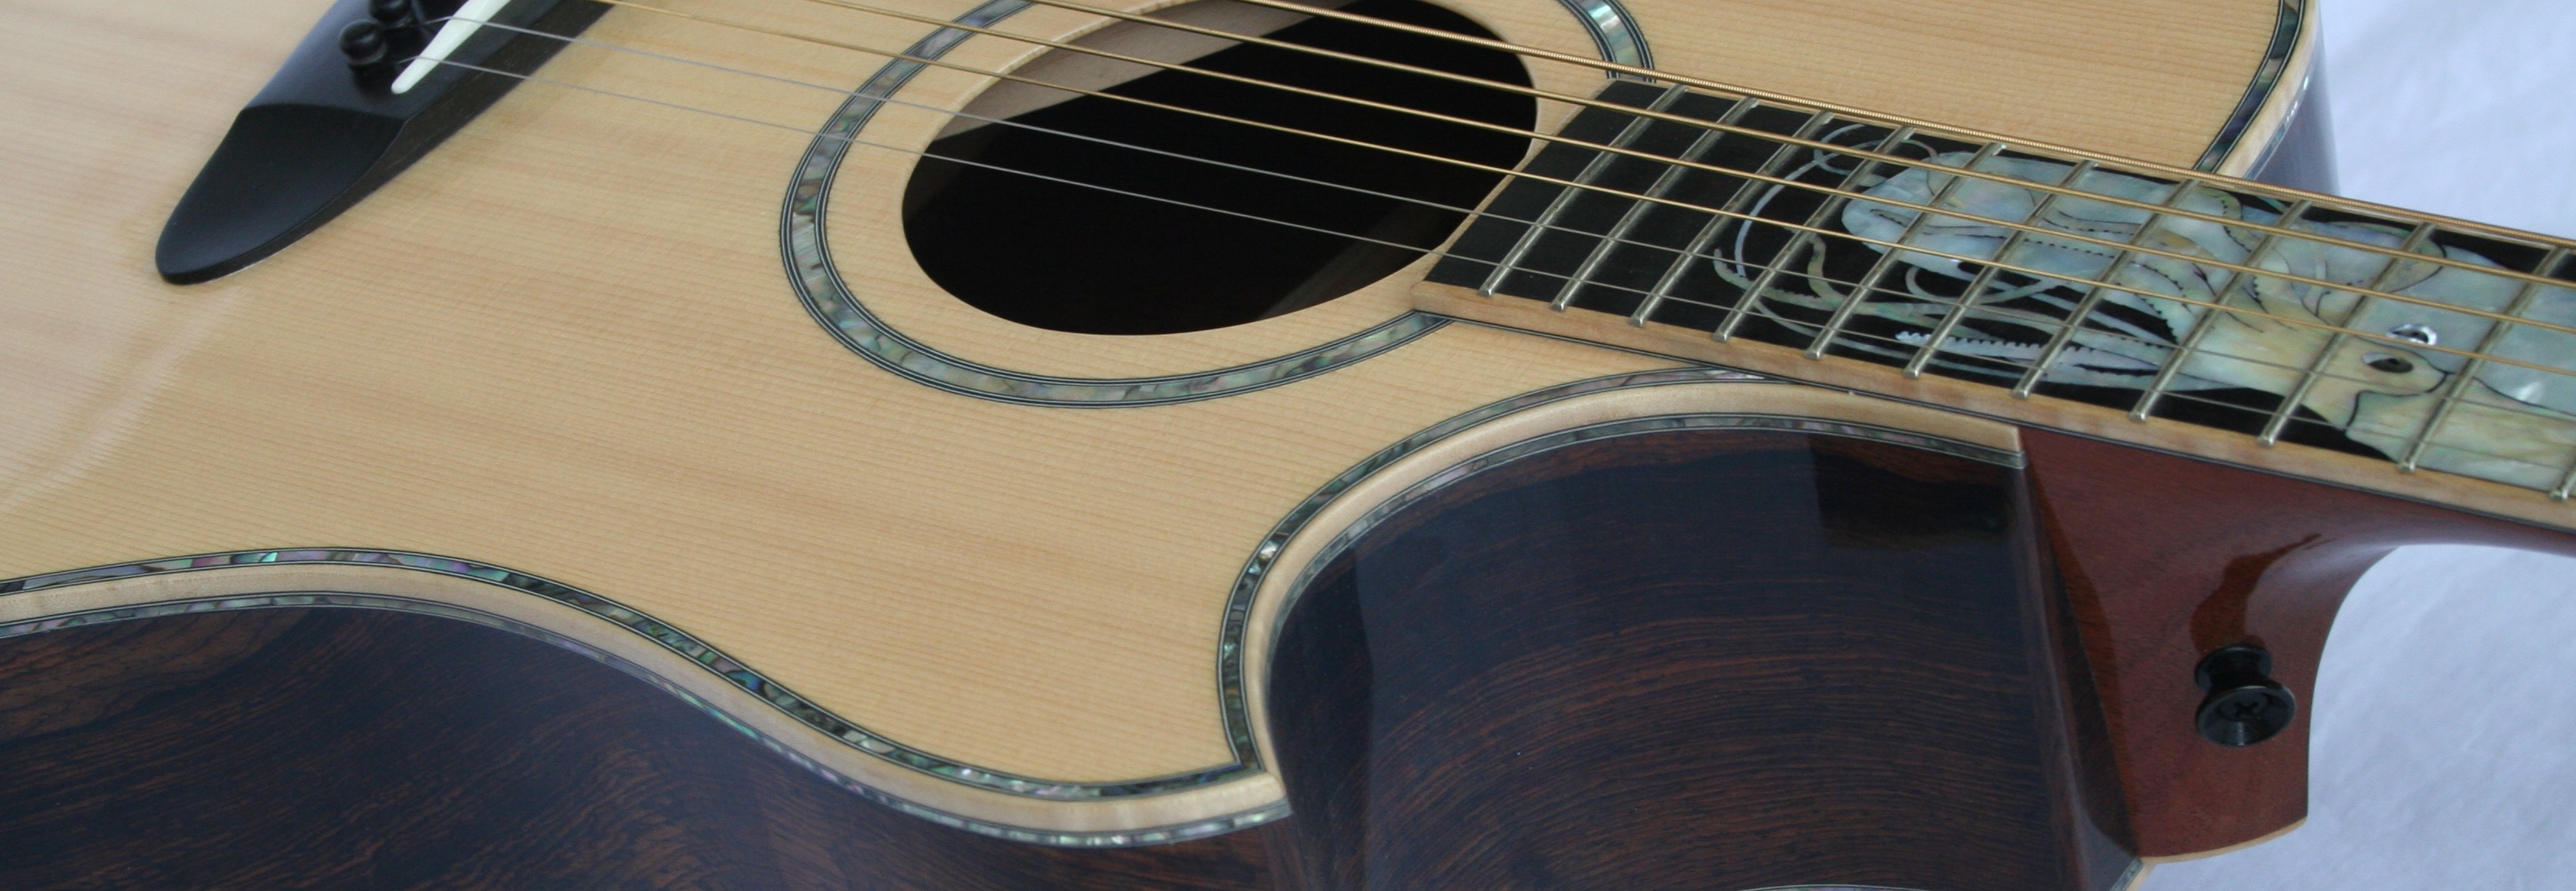
People love shell inlays and top edging. If you want to see the very best, go to the Victoria and Albert museum in London and find Joachim Tielke's masterpieces in the room full of renaissance instruments. Nothing even comes close. I keep it pretty simple with edging on the body and fret markers or organic motifs on the fingerboard. For an ab top, a thin coat of shellac is added to keep the CA glue from soaking into the end grain. A piece of thin purfling is tacked on and up to 60 pieces of abalone are ground to fit. The edging is soaked with CA glue because the next step is cutting off the excess abalone with one of the binding trimmers.
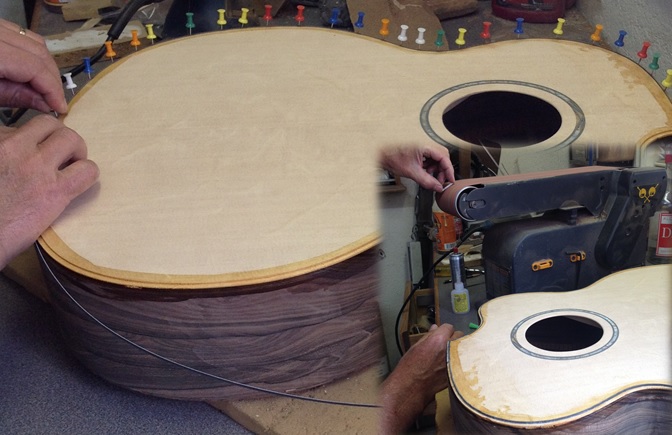
The binding is attached using flatback tape. The pieces are fit dry at the tailblock and the miter at the heelblock is done on the fly. It is a tricky fit with the most complex curves in the cutaway but it gets easier with time. Sharp tools and a good eye are necessary to get the assembly right. Also,there is no substitute for a perfect fit. The binding is bent on the same jig as the sides. Similar to the key elements of the body, the binding should be cured and assembled at the same temperature and humidity as the body. When the job is done there is glue all over my fingers so no picture during - yet.
After plenty of tedious scraping, sanding and detail work; it is exciting to see the first coats of finish go on. Beauty and flaws are realized. A bit more detailing and up tp twenty coats of waterborne lacquer will be added before the guitar is ready to be assembled.
The neck assembly is straightforward. The rough profile is cut from a block of mahogany on the bandsaw. A slot is cut to accept the high modulus carbon and maple truss assembly. The truss is glued in and the ears attached with urethane glue. The peghead and fingeboard mating face is planed on the beltsander. The peghead veneer is glued on and the peghead is drilled, shaped and complete before the fingerboard is added. The carbon truss handles stress loads far better than any other system which leads to better resonant qualities. Additionally, the truss extends into the peghead making it much stronger than a peghead with a hollowed out spot for the truss rod nut; i.e, no United breaks guitars videos.
Custom guitars usually get the full treatment. Dressing up the peghead highlights a key element in a guitar's construction. The binding rabbet is cut with a standard laminate trimmer and attachment. Binding is neatly mitered and glued on. Inlays are drawn, sawn and imbedded into pockets made with a laminate trimmer and .031" spiral cut endmill bit.
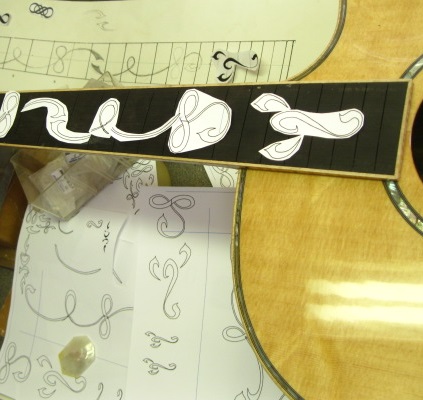
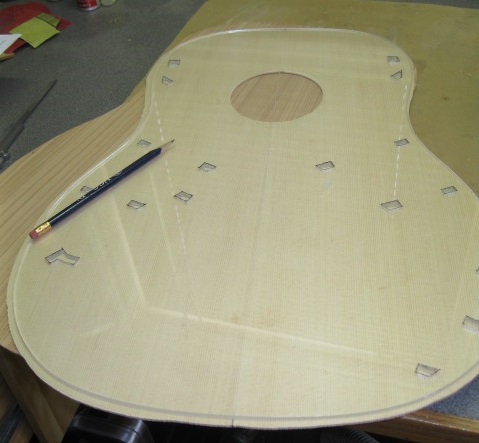
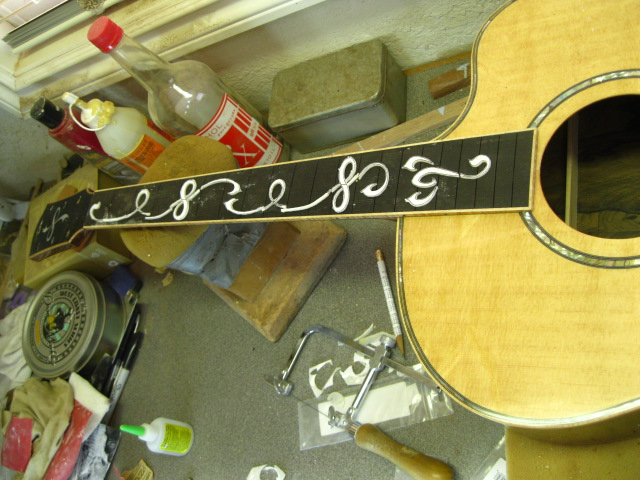
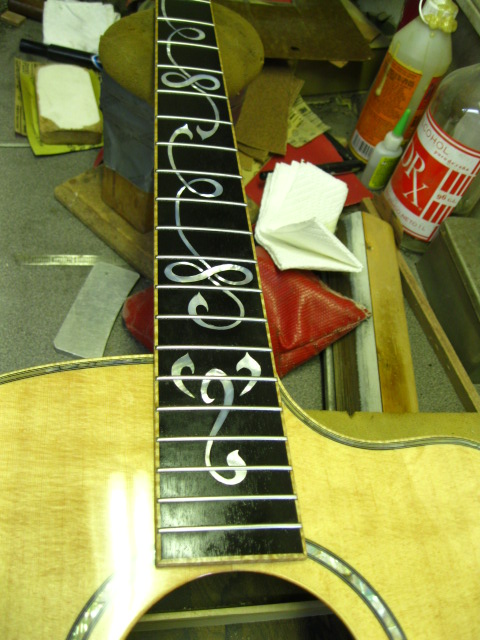
It is important to include the client in the design process. This guitar's owner, JG searched the internet and sketched ideas for the inlays on his ultimate guitar. I made suggestions for improvements then made the final drawings in MS WORD. In the photo, the drawings are placed on the fingerboard to check for scale and composition.
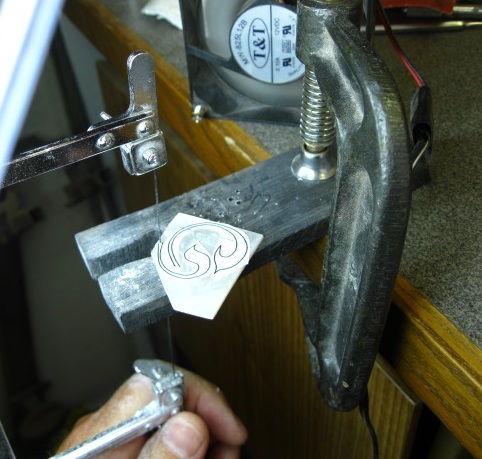
The drawings are tacked onto shell inlay blanks and cut out with a fine jewelers saw. Different colors and species of shell are available as abalam; super thin layers of shell laminated into a sheet. On this job, the shell is solid mother of pearl. It is very hard. An inlay set can eat up 10 saw blades or more while abalam may only use one or two. The benefit of solid shell is that it is much easier to engrave without chipping and ruining the work.
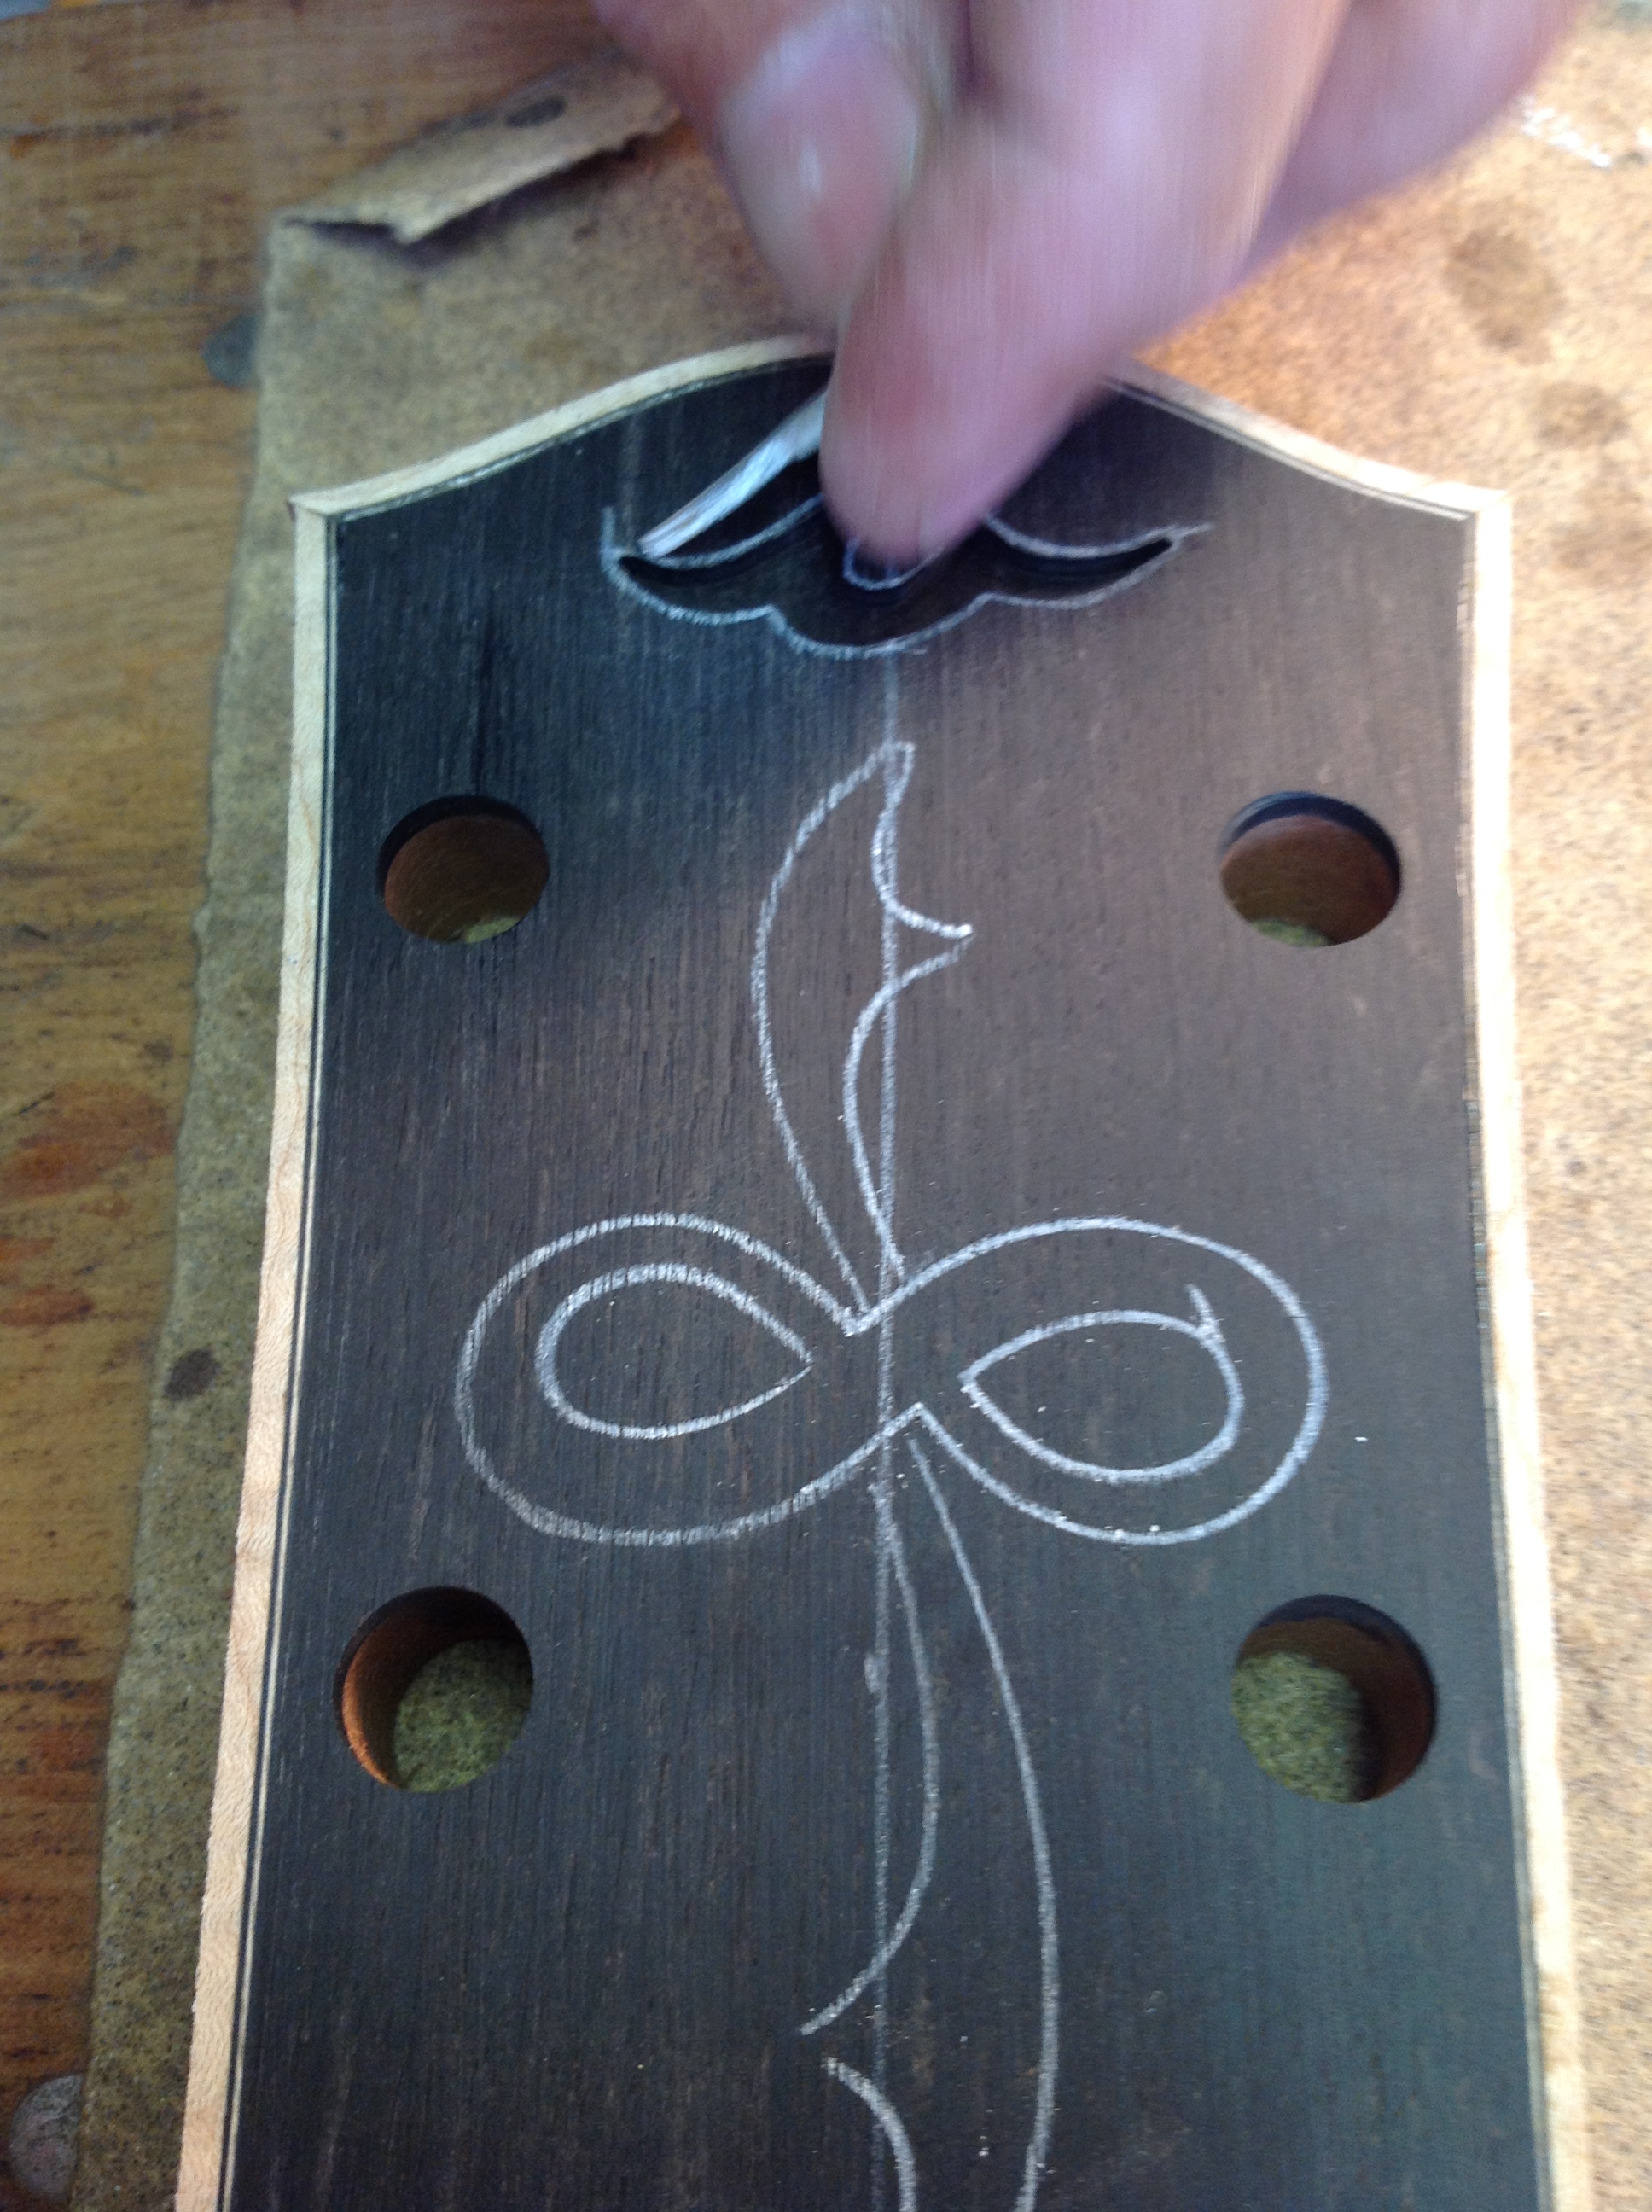
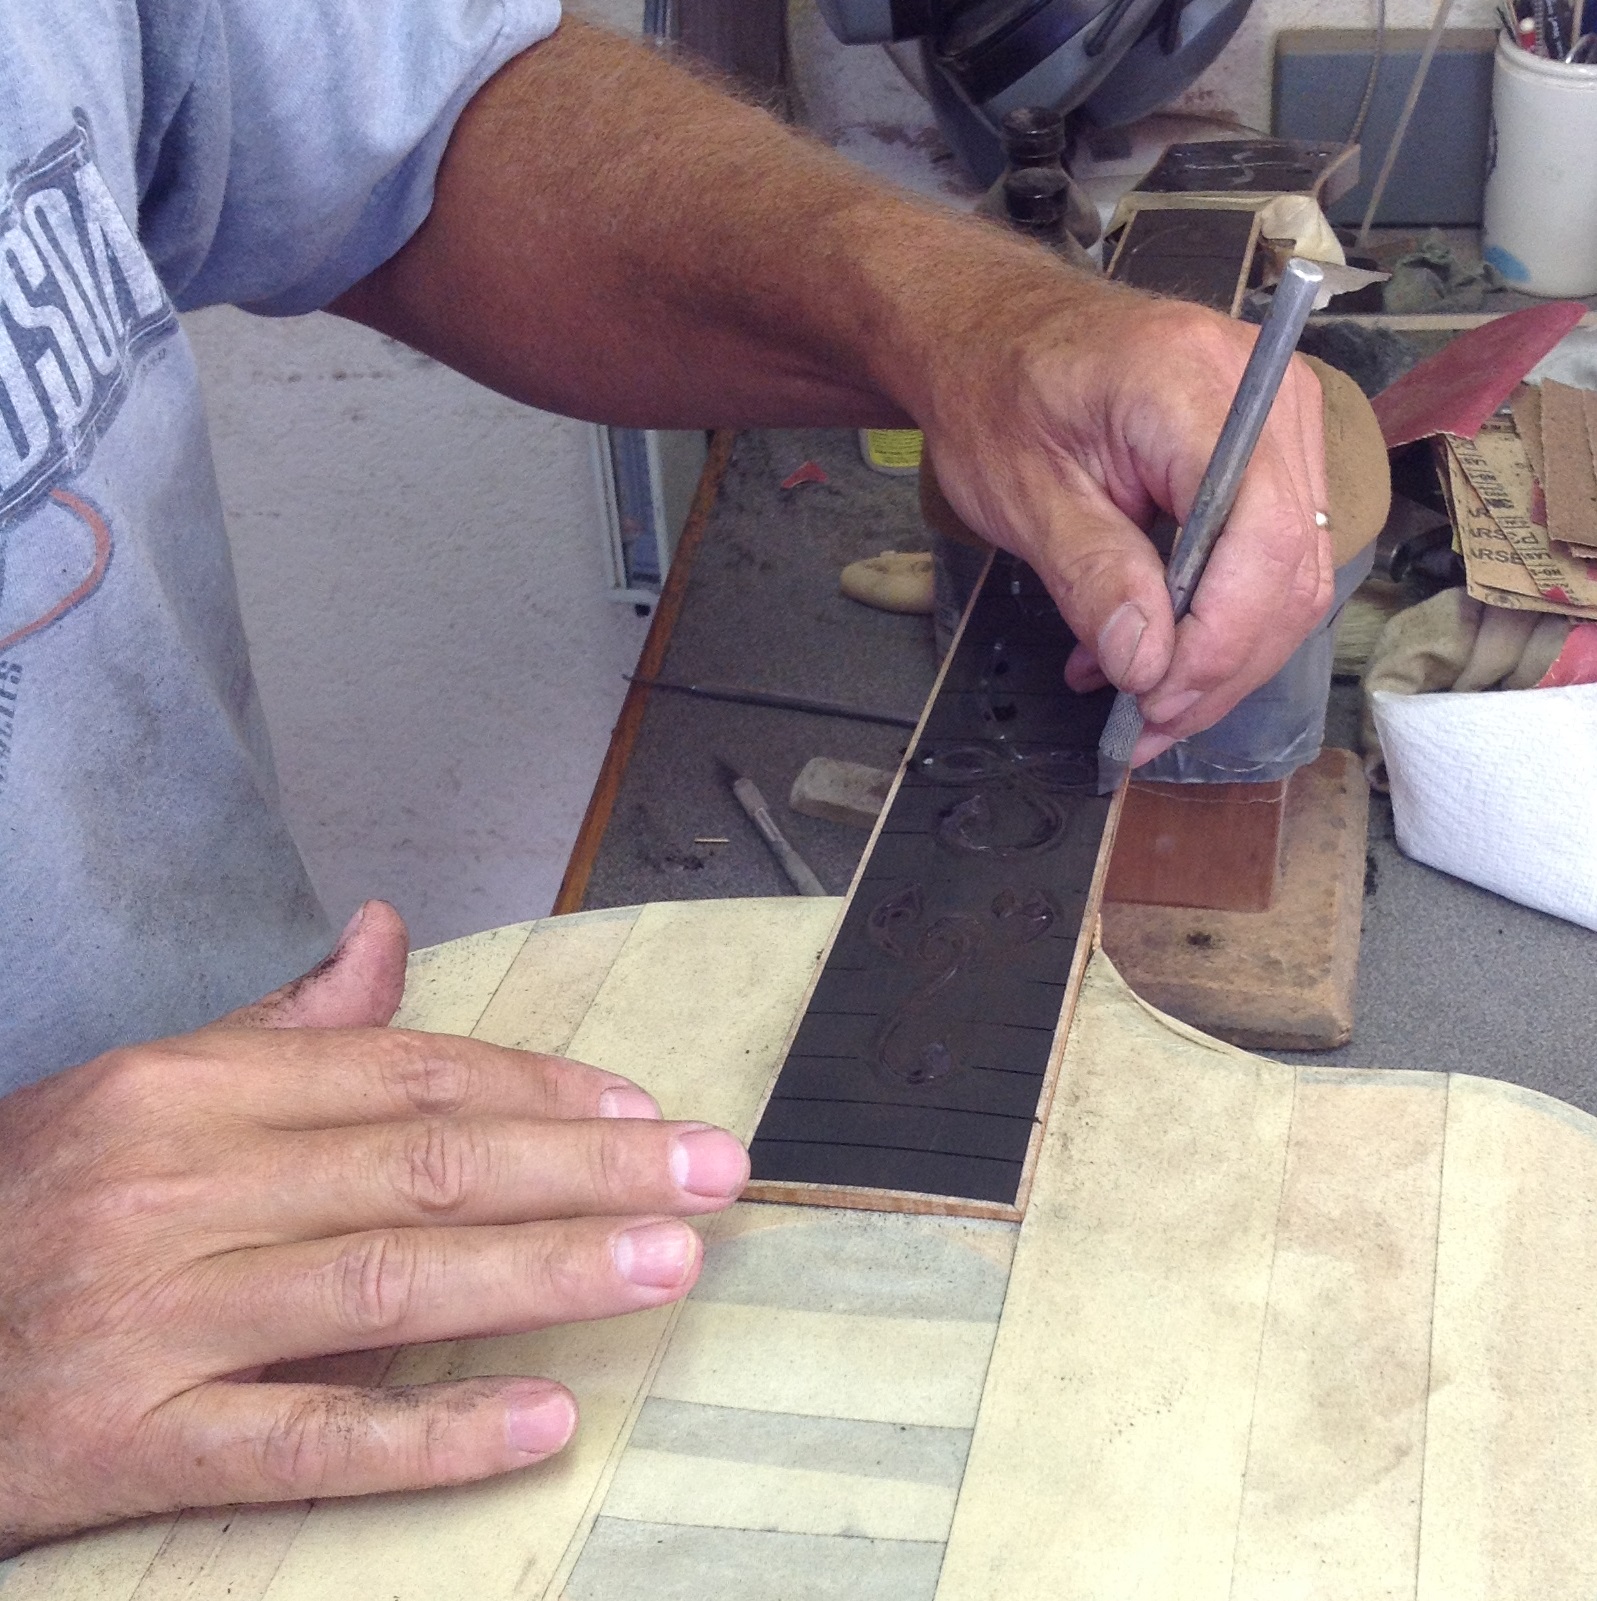
After they are all cut out, the inlays are placed on the fingerboard to check the composition. Any irregularities are handled and the inlays are traced onto the fingerboard with a sharp pencil. Next, the inlay pockets are cut with the laminate trimmer and the inlays are carefully pressed into the pockets
The inlay areas are colored to match the wood then tack glued so they don't float during the gluing process. The felt pen coloring stains the glue and makes any gaps imperceptible. End grain dust from a scrap is packed into any gaps and then carefully cleaned out of the fret slots. A bit of accelerator is added to the dust packed under the areas where the design crosses a fret slot. This keeps the fret slot from accepting the CA glue which seeks every void because of extreme capillary action.
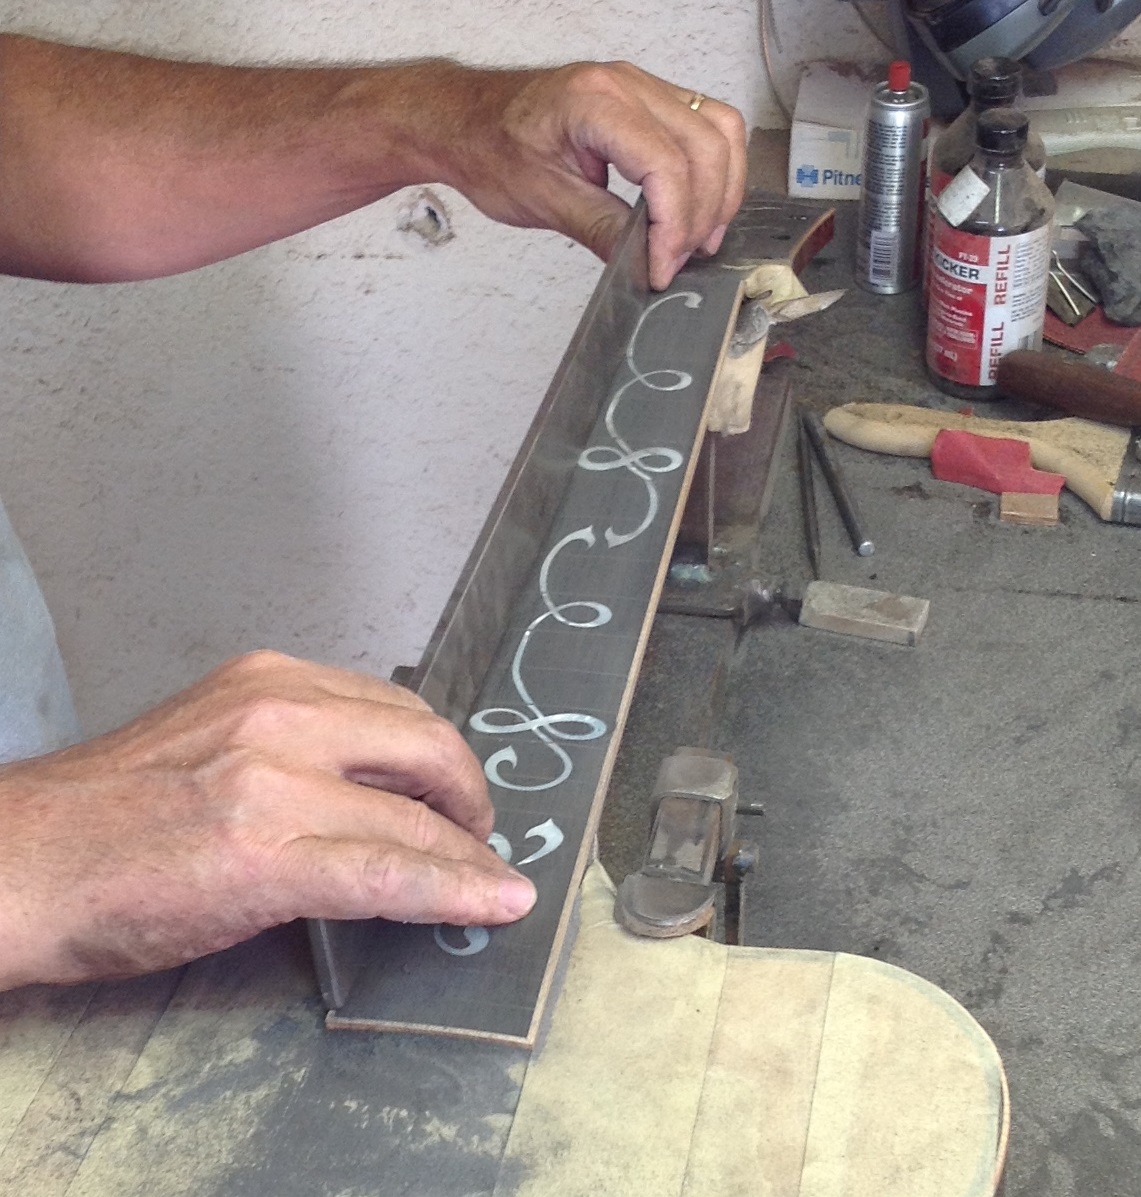
Viewing the inlays imbedded into the fretboard for the first time; the elation is fleeting because this critical step can make or break that first impression for the client. The guitar is placed into a jig that simulates string tension and then fretboard is shaped to .001" tolerance. The fret slots are re-cut where the inlays cross them. More sanding then the guitar is removed from the jig and the frets are tapped in.
The guitar is placed back into the tensioning jig and the frets are planed and crowned. Then, the guitar is removed from the jig for final dress and polish then placed in the jig one last time. Planing with 2000 grit paper on a sanding block makes sure the guitar will play perfectly. I use boiled linseed oil to treat the fretboard. I have used walnut oil, grapeseed oil and almond oil to good effect. I never use lemon oil because it eats finish. After this step, the guitar is detailed, the nut, saddle, tuners and pickguard are added. One more inspection then the guitar gets strung up, the nut slots cut, some more detailing and ready for delivery.
One more thing...
Whether you are a seasoned pro or a weekend player, I can bring your game to the next level. I focus on sound and
achieving concert performance. However, beauty in a handcrafted instrument can be wrought in a number of ways. My greatest reward
is to bring joy to artist and audience. I treat all my clients as if they were friends and many become so. Perhaps, one day
we will meet and I will build your perfect guitar. If you are interested in learning more about guitar customization
please see my tech page or contact me directly.
email email form
phone 760-271-6250